
Camp Chair Repair
/I saw another patient this week in my clinic. My neighbor across the street stopped me as I was getting my mail and asked if I’d look at his camping chair (which is more of a full on hunting chair, we’ll get to that in a minute) and see if it could be repaired.
This particular neighbor has a snowblower, and since we decided to have Christmas-ween this year, I was reminded that he’s such a nice neighbor that when he sees me struggling with my shovel, he’ll come by and help me out with his machinery. So, of course, I’m happy to oblige! OK that sounds selfish, I would have done it even if he didn’t have a snowblower.
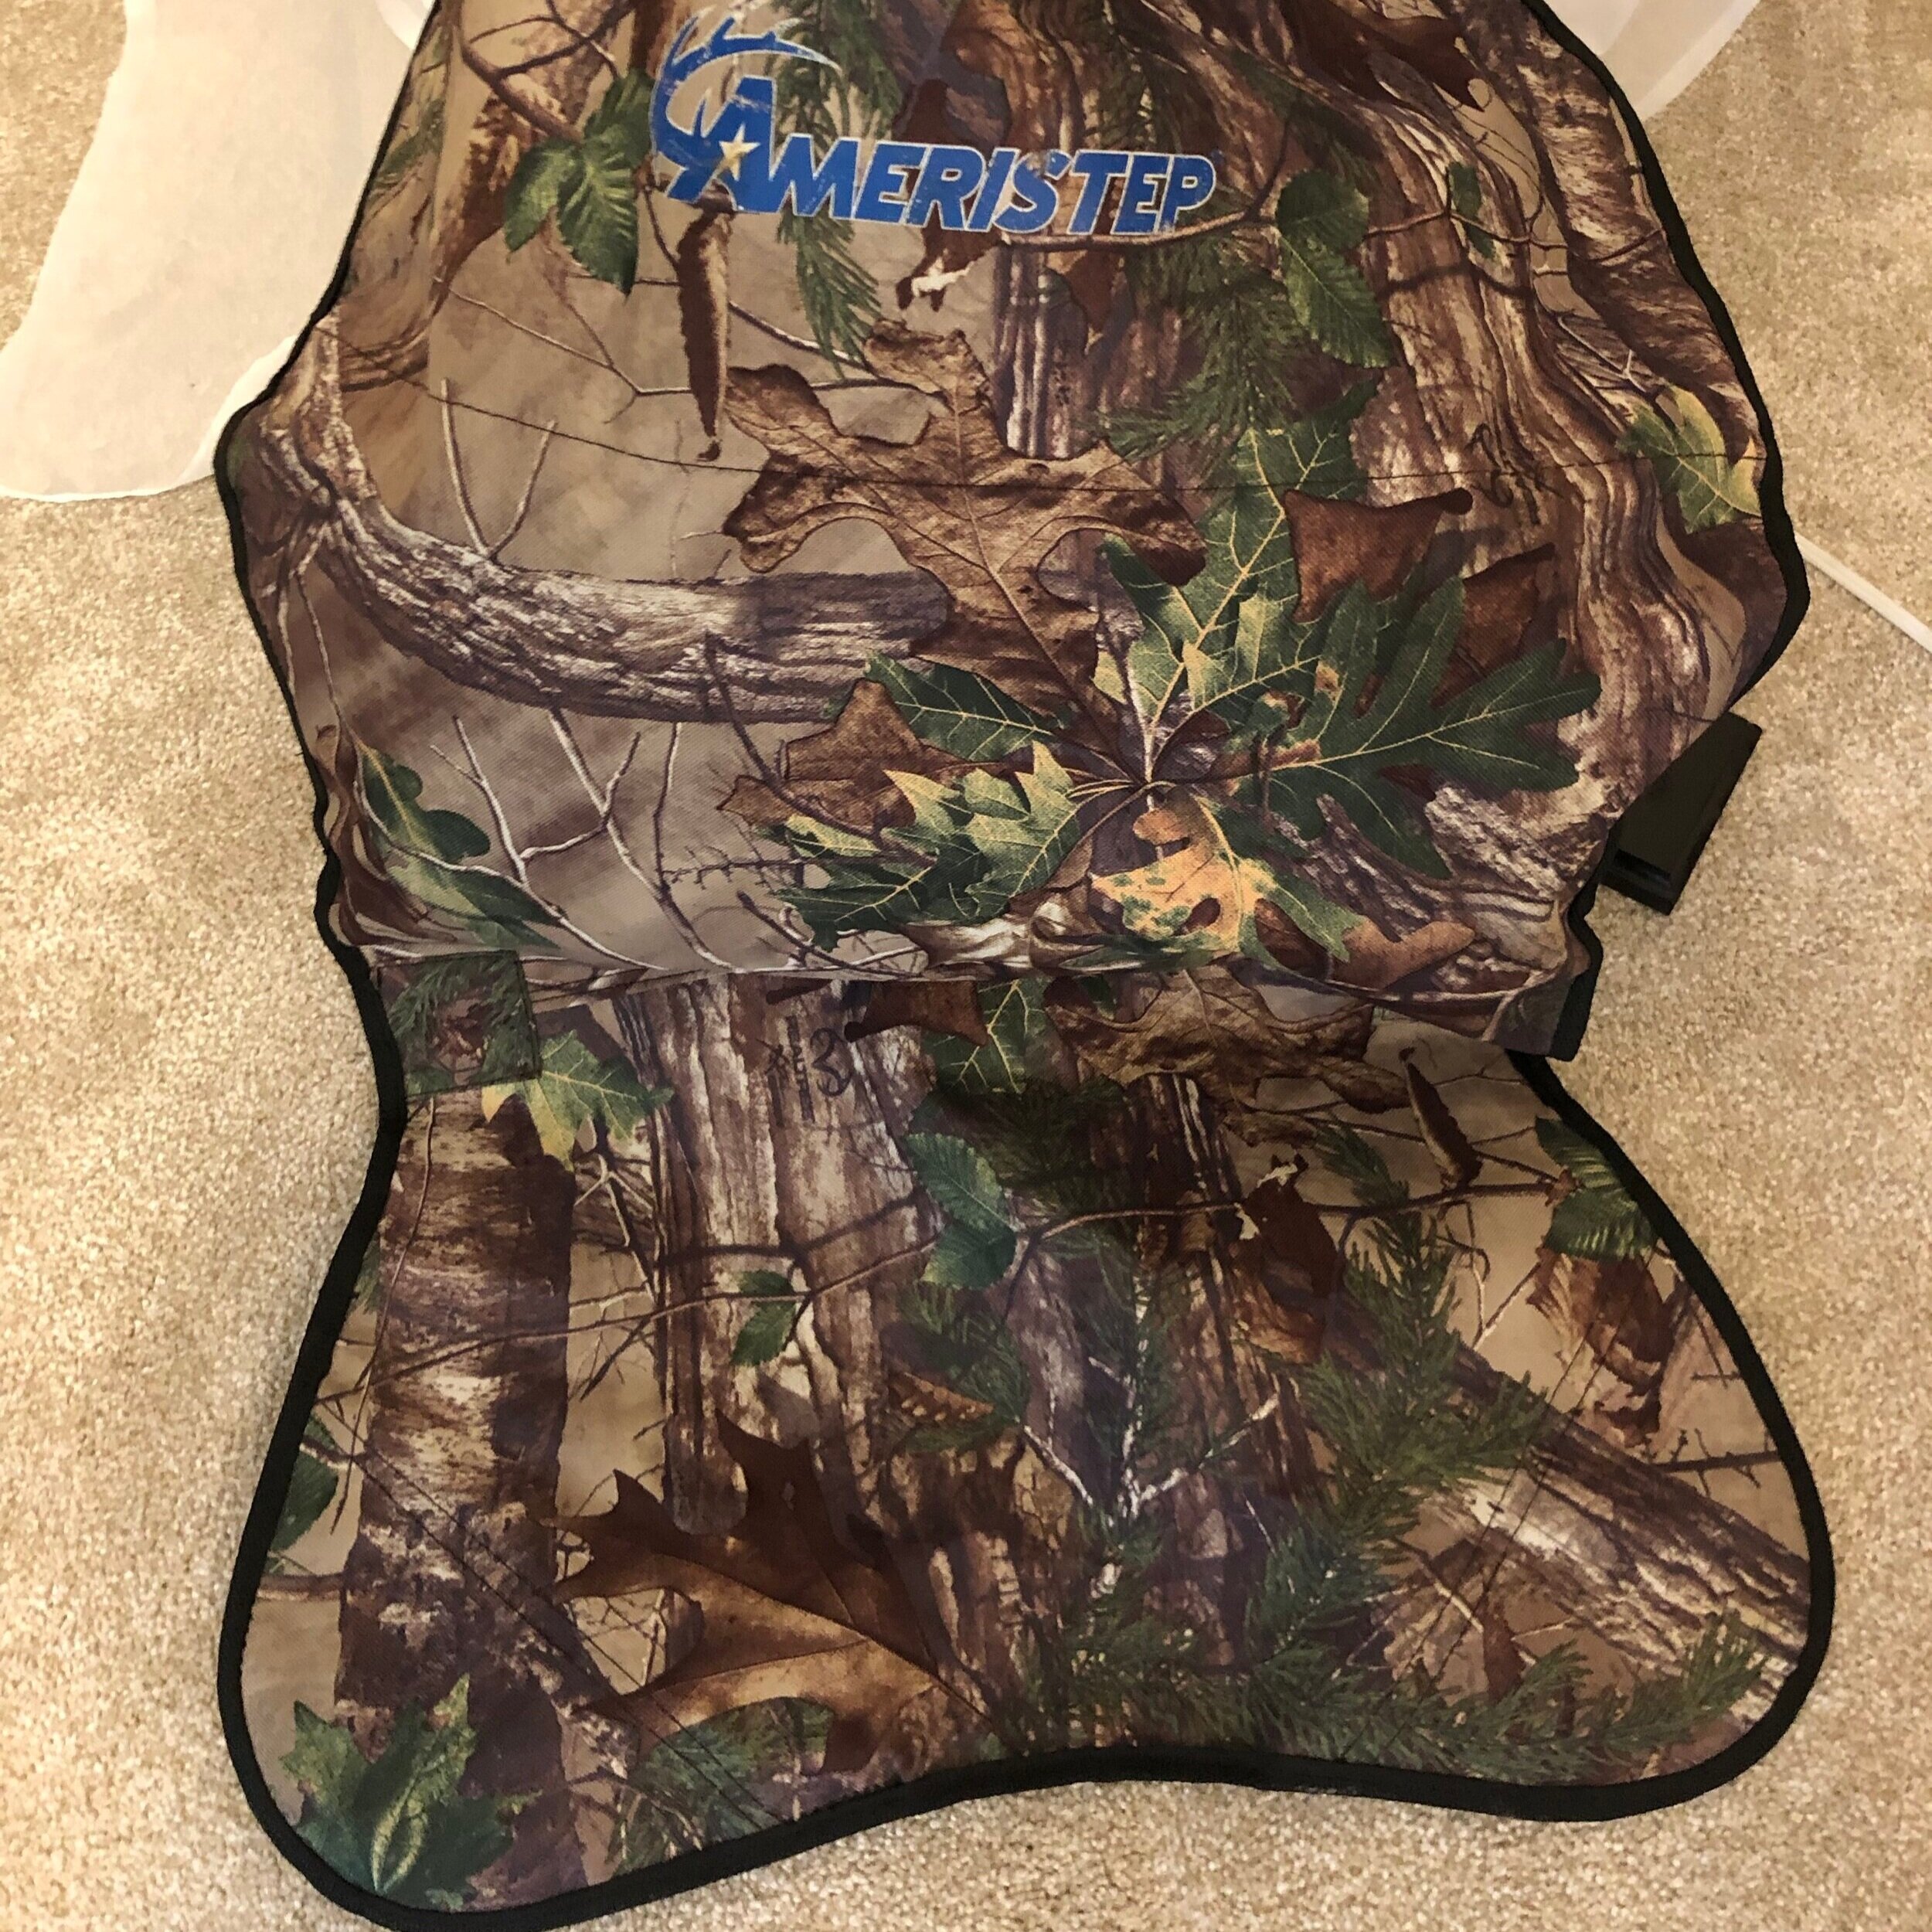
The chair attaches to a frame, and there are pockets at each of the 4 corners that you’d slide the frame into, and then there are little ties that secure it to the frame. Two of the corners were damaged. Not a complicated setup, and easily fixable. The binding was intact, but some stitching had come undone, which resulted in the pockets separating from the main body of the chair.
To fix this, I started picking out stitches on the binding to get a better look underneath, and found that I disagreed with this chair’s construction. Shoddy mass-produced work, in my humble opinion.
The pockets were basted loosely to the main body of the chair, and it was basically relying on the binding to hold it all together. While that’s fine for something that doesn’t support weight, I don’t think that was a good idea for something that needs to support a human, who may or may not be up in a tree stand with a rifle. Safety first!
I decided to go further and repair all 4 corners. If I’m going to fix something, I’m going to do it right. And, remember, he has a snowblower.
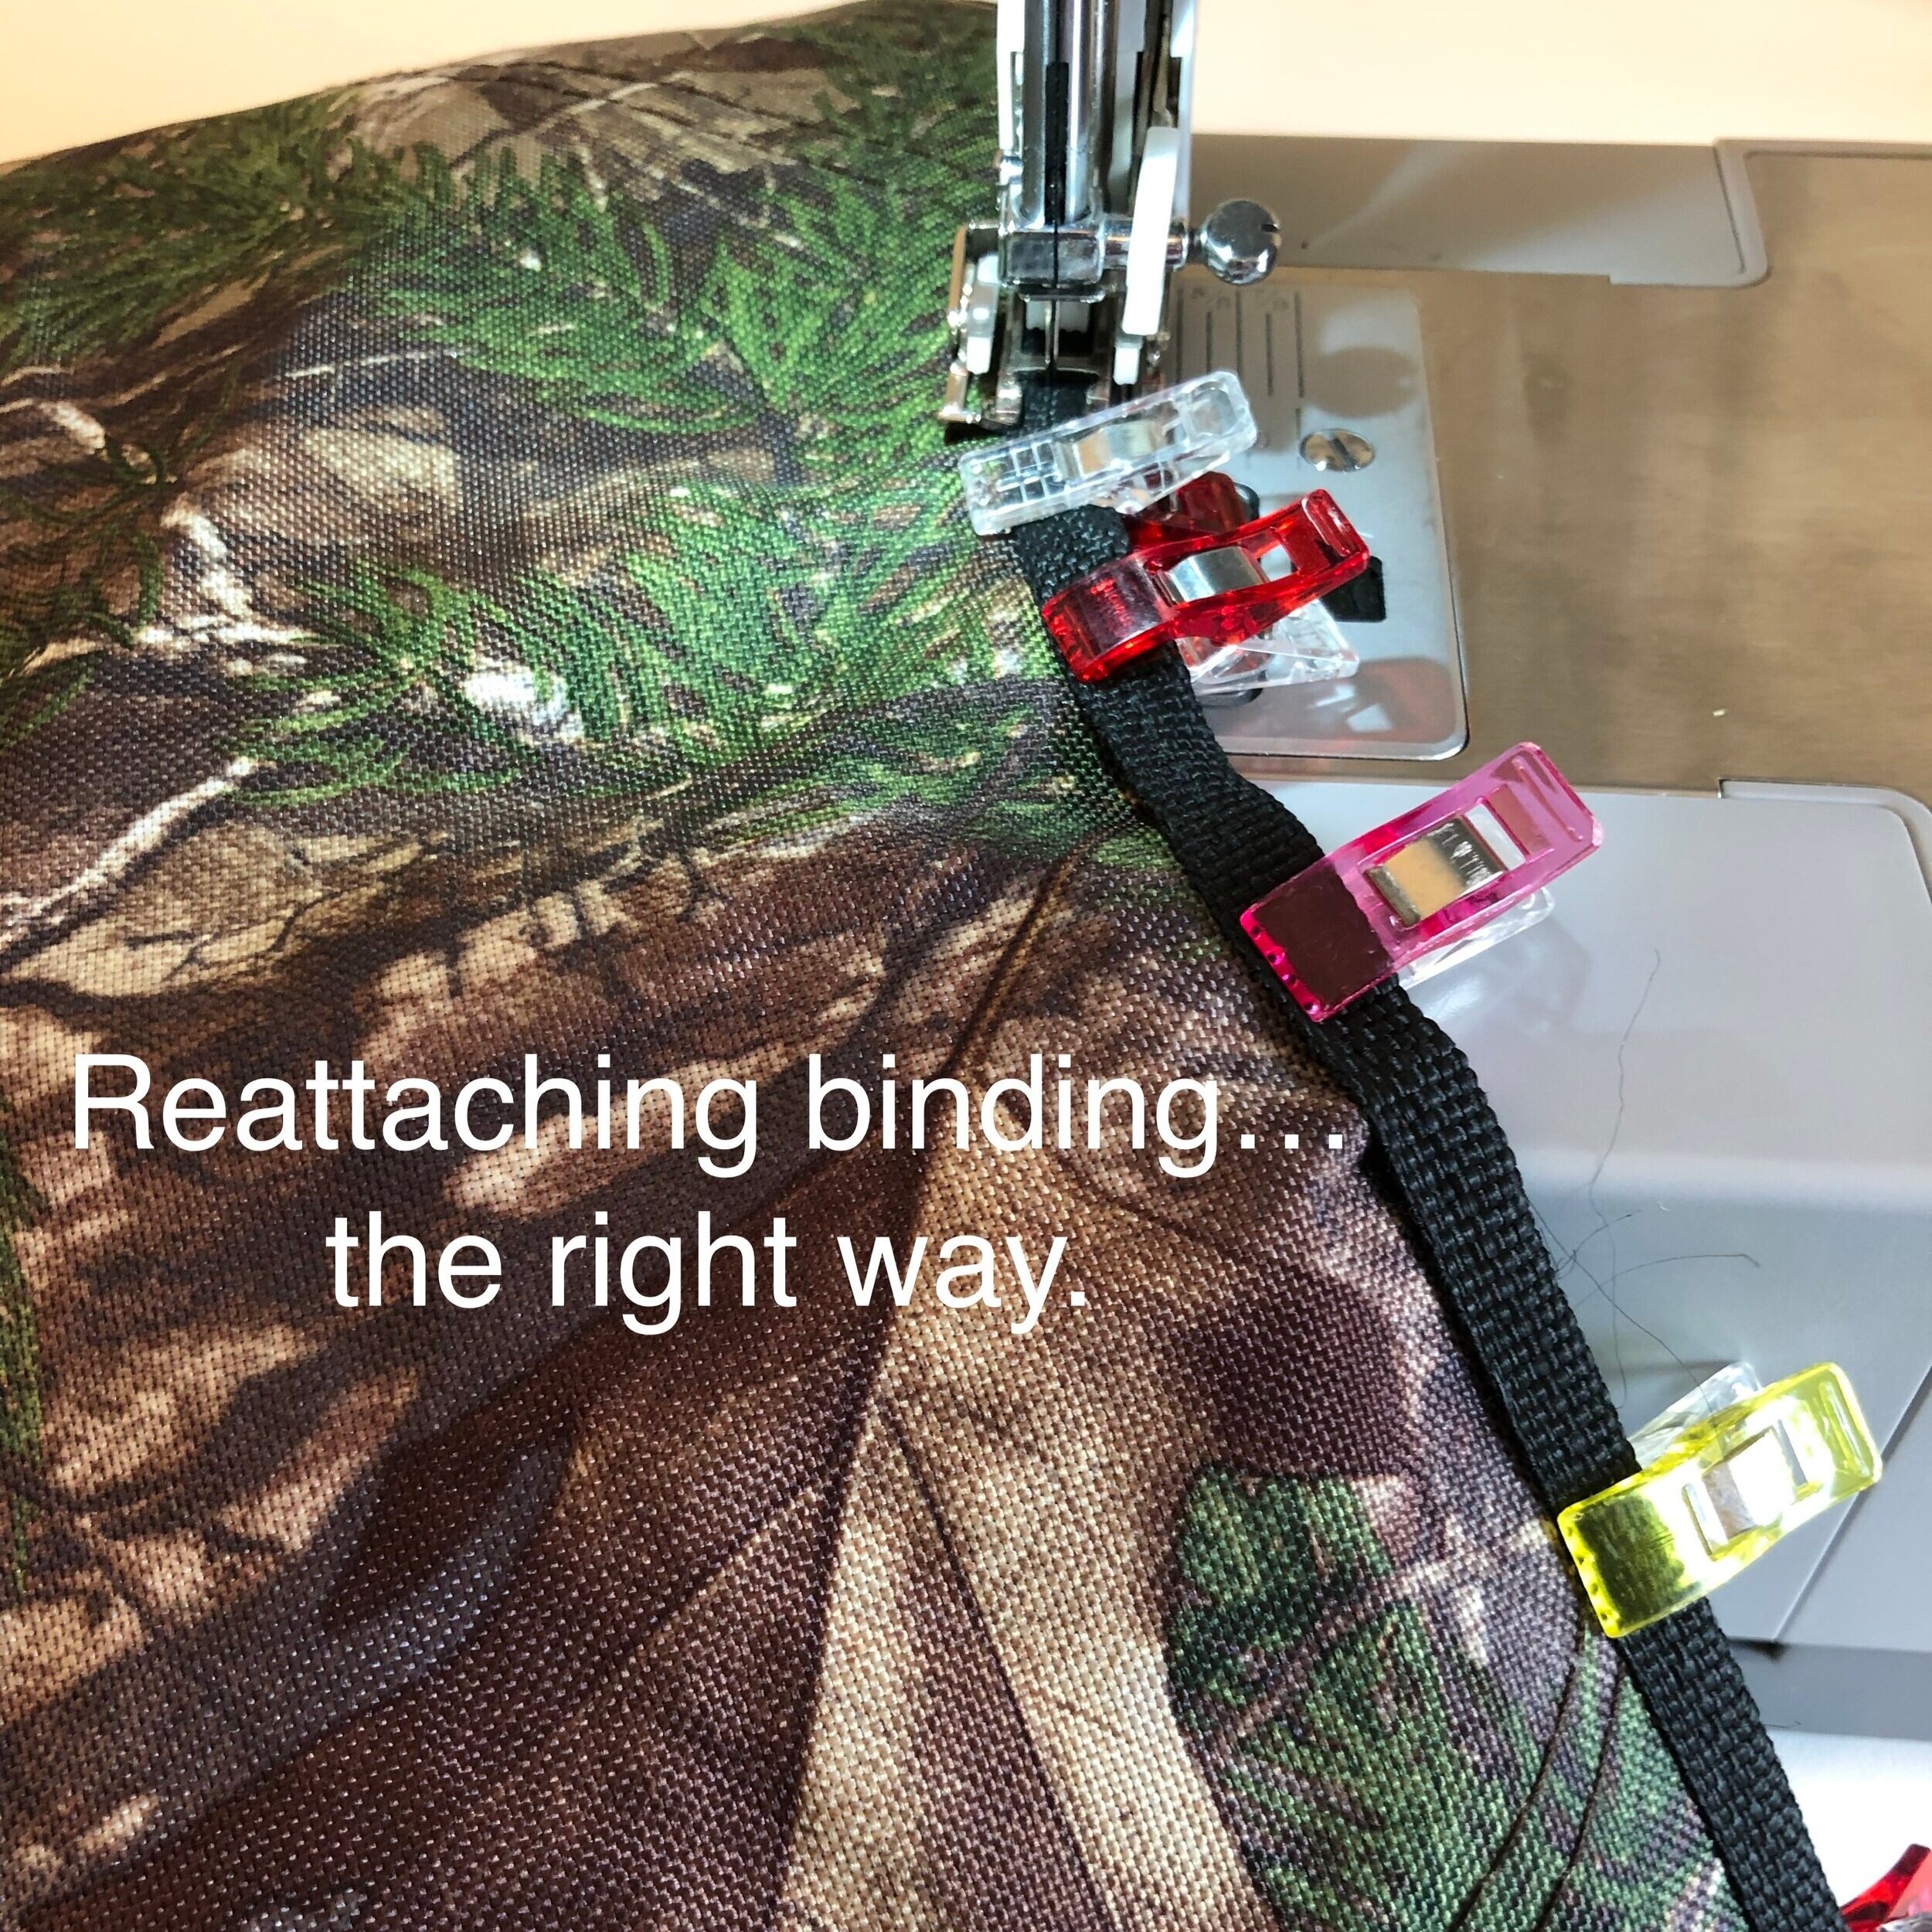
As I picked out the corner on the opposite end, which appeared to be intact, I realized that when this was sewn together, the machine’s tension had clearly gotten messed up, resulting in a rat’s nest of thread looped around each stitch. How did they not notice that? Plus, from picking out the stitches, I could tell that they sewed this from the bottom side (they should have sewn on binding from the top). When you fold binding, the bottom side is slightly wider than what you see on the top, and the reason for that is so when you sew, you’re sure to catch the bottom of the binding with the stitches. They clearly missed that day in sewing school, and they had several stitches where the binding on the top side wasn’t even sewn on.
I pulled the binding off, past each of the corners. Since part of the problem was that the pockets were only loosely basted to the main body with no backstitching to secure, I used a zigzag stitch (with heavy duty UV coated thread) to attach them together. Those will NOT be coming apart anytime soon.
I used a pressing cloth and hit the binding with my iron to re-flatten it out so that I could re-align it properly.
Using a walking foot on my heavy duty machine, I reattached the binding, sewing from the top side to ensure the bottom of the binding was caught in the stitches.
This chair has this crazy netting with “leaves” attached to it for camouflage, and what I did not anticipate was that it might have actual leaves inside. You know, from being outside and stuff. When the netting unfolded, I wound up with some nature in my sewing room. I probably should have opened it up and shook it out in the garage first, but oh well, nothing a vacuum can’t fix. At least it’s not glitter.


Penelope the dress form in camo chic