
Death Star
/Since I spend all my free time watching woodworking videos on YouTube, I came across this gem from Lincoln St. Woodworks and decided it needed to be done. This guy is funny, even if you don’t woodwork, this video is worth a watch to learn the names of all his tools in his shop.
I had a bunch of 1x4 pine laying around (originally intended to be the slats for my Big Girl Bed) that needed to become something since they didn’t make the varsity team, so figured this would be a good use for them.
I edge jointed the boards (which were very knotty and crappy since their original purpose was not to be seen) and laid them out and numbered them. I made a circle template and traced it out so I had a general sense of what this thing would look like. The circle is about 36” diameter.
This is my second time using dowels - the first time was to attach the headboard trim to my headboard for my bed. I got a little Milescraft dowel jig from Menard’s and really like it. I primarily wanted to use something for alignment because this was going to be a big glue up.
After drilling out a zillion dowel holes on the edge of each board, I did a dry fit and got ready for glue. It was a total shit show. Glue was drying faster than I could get all the edges glued and doweled, so suffice to say, I was glad when it was over.
I let it dry overnight and then did some sanding on both sides to get it ready to become a circle. I got a new cordless jigsaw and it’s way better than the original cheapo one I had from Harbor Freight, which was super jumpy and made scary noises. This new one is much calmer and the variable speed is in the trigger, which allowed me better control. This project really helped me get more comfortable with using a jigsaw.
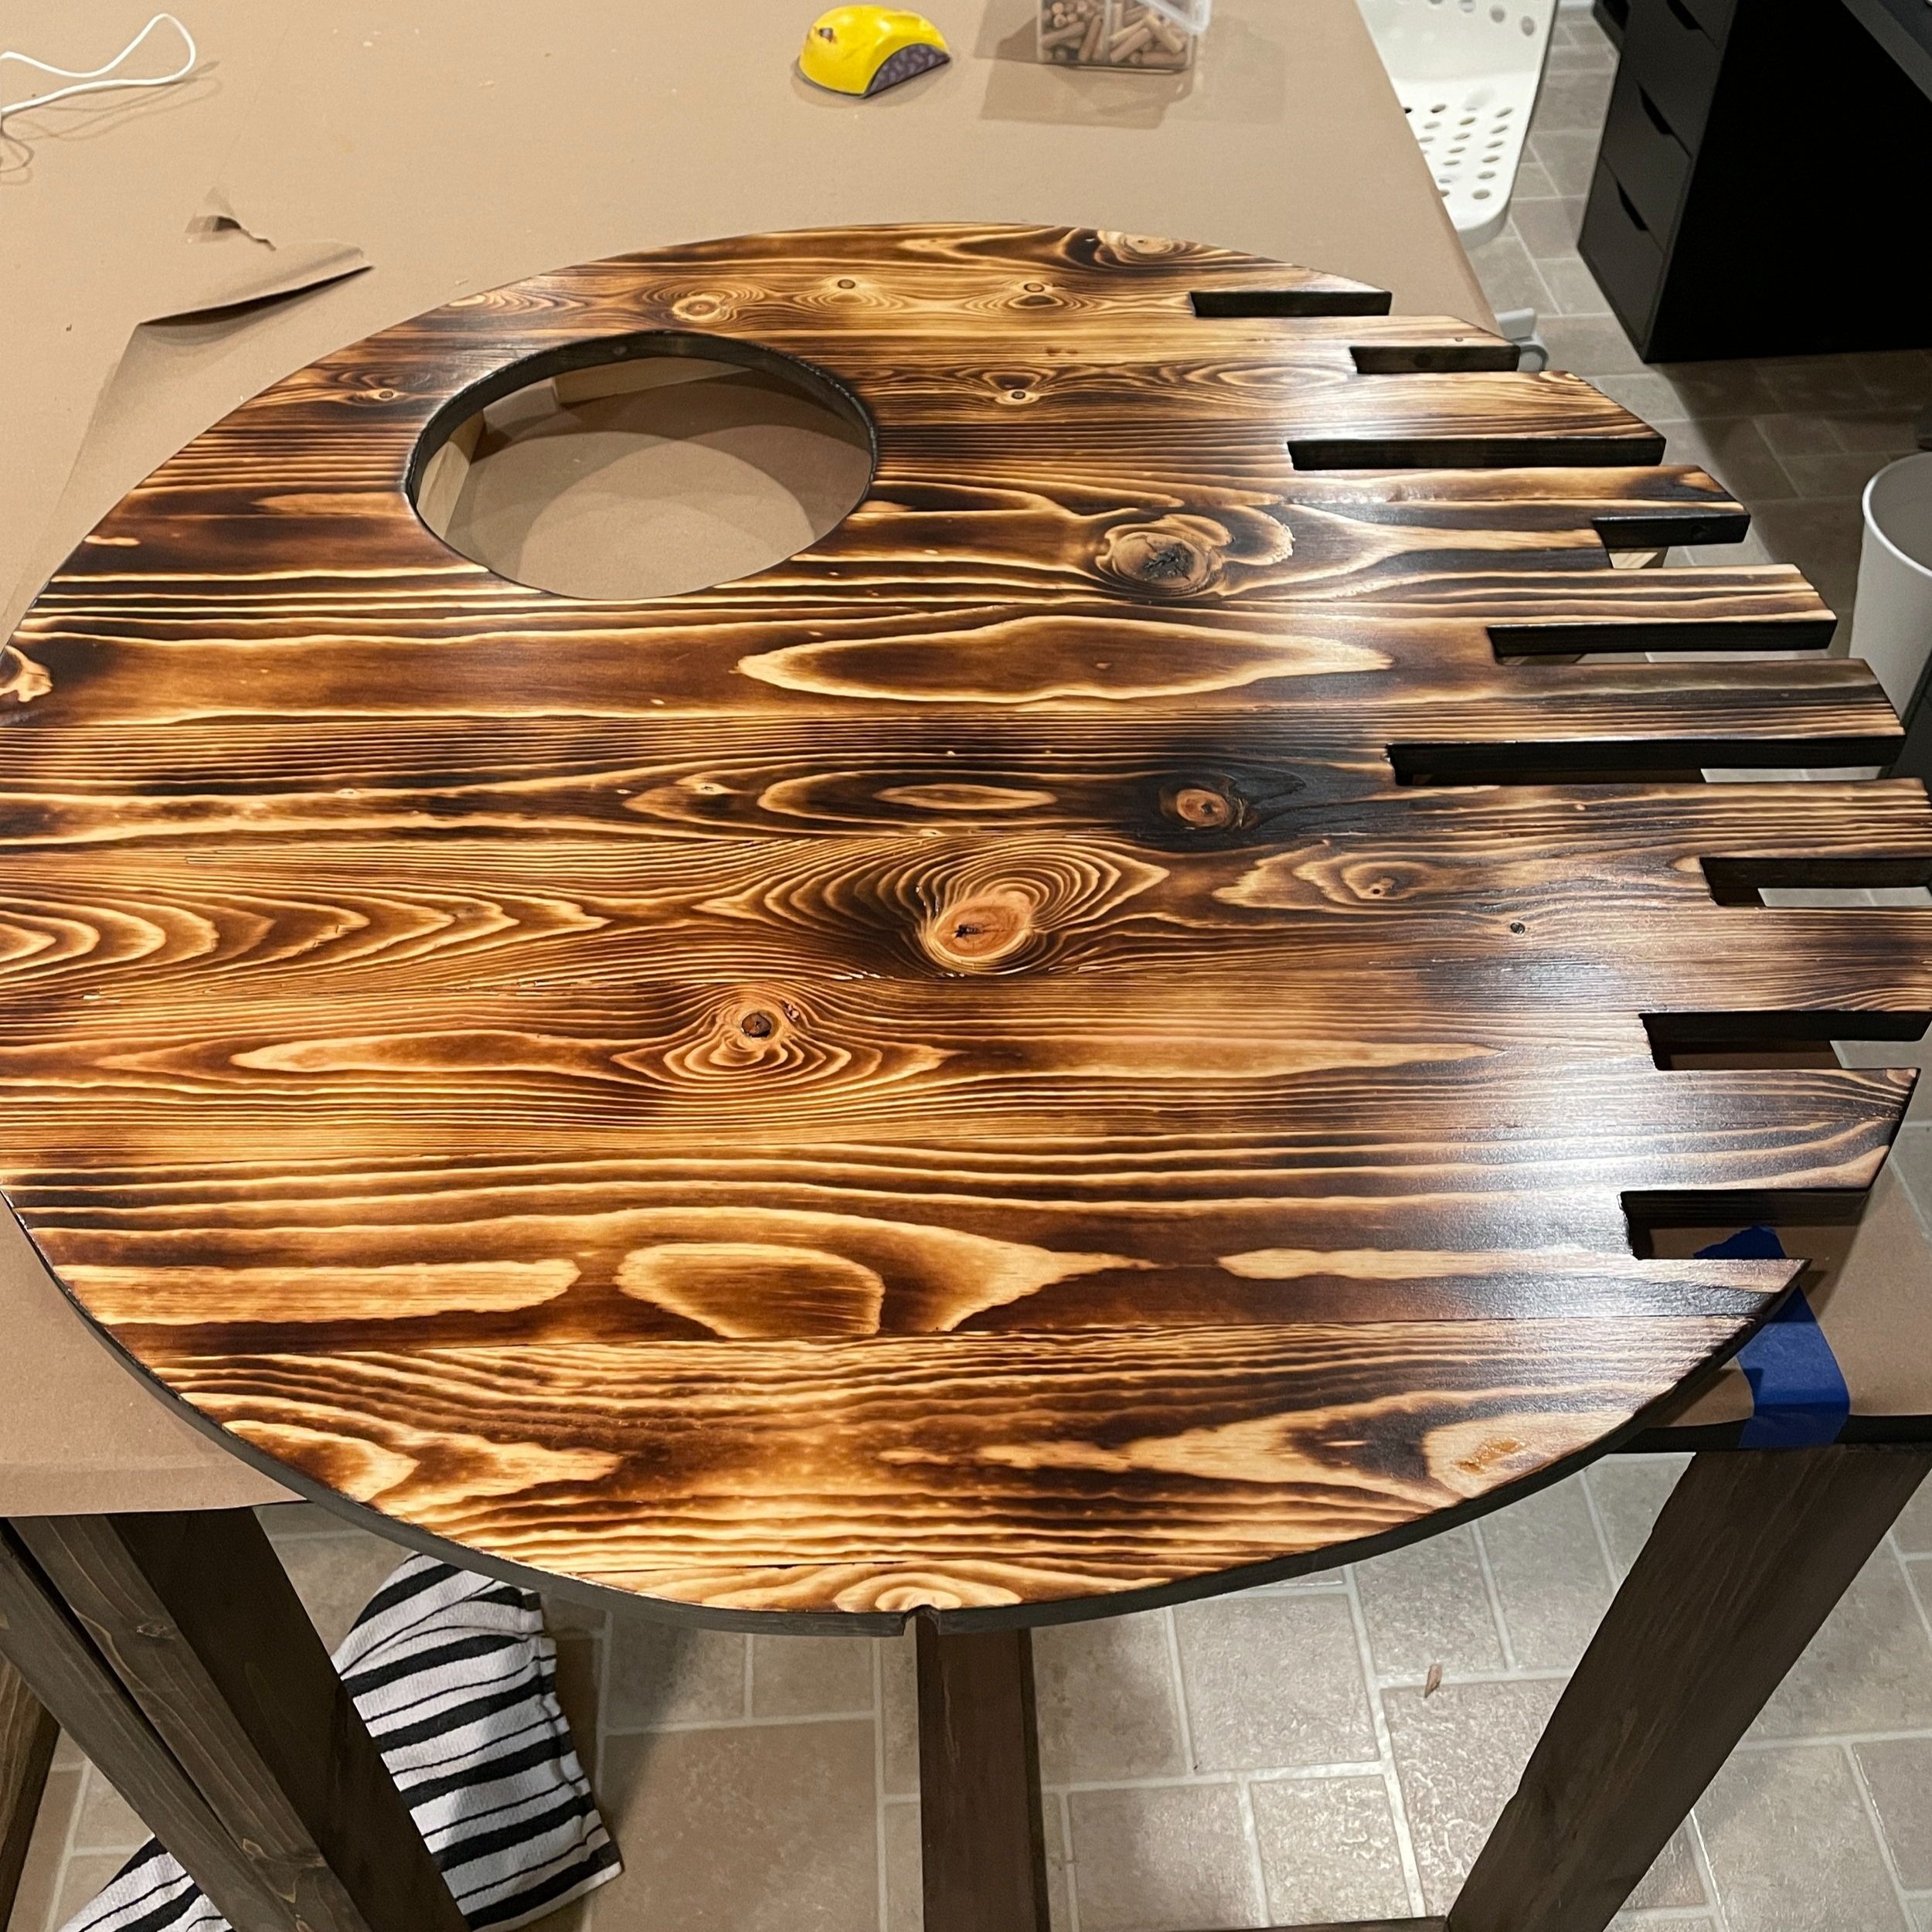
I cut out the random patterns on the right side (because this is a Death Star II model), and then thought I’d get super fancy and also try out my new Dremel to carve out the superlaser focus lens but I quickly learned that I need more practice with the Dremel. So, I went back to the jigsaw and cut it out.


I thought it would be cool to use my flame thrower to give this a burnt finish, and you must know that this is way more fun than it ought to be. Since it was a balmy 35 degrees outside, I opened up the shop door and placed it on some scraps on the driveway. I did the back side first to figure out how dark I wanted to go and once I was happy that I knew what I was doing, I flipped it over and did the front. I did have some glue squeeze out that I had missed when sanding, so I took it back inside and used a chisel and block plane to get rid of that because it was definitely blotchy and visible after burning the wood. I gave it a quick sand and went back outside to try it again. This time it looked much better!


The end grain didn’t really want to burn, so rather than risk screwing it up, I took some of my black paint and diluted it with some water to make a “wash” effect. I used a foam brush to apply to the end grain and wiped it with a cloth.

I rubbed it down with a scotch brite pad to get rid of some of the dust, and applied a few coats of General Finishes High Performance clear coat.
After the finish was dry, I flipped it over and installed a french cleat for hanging and also screwed in some supports. I used some black paint to paint any potentially visible edges of the cleat/supports. This would be perfect to backlight with some LEDs but I’m trying to adult here.
Once all that was done, I stood in my stairwell looking at where I wanted to hang it, and used the Force to get it up there.

