Lined Jumper
/The Lined Jumper...

I decided to wear the jumper I made to my family's Christmas Eve celebration. Got into it and realized I couldn't zip it up all the way. My arms just don't go that way. So, in the blustering cold, I marched across the street to my neighbor's house and rang the doorbell.
"Hey! Merry Christmas! So, I need a weird favor...can you zip me up?"
After some laughter, they were kind enough to zip me. I love my neighbors. But, it raised an important point that I had never really thought about: I need my clothing to be do-it-myself in the means of getting in and out of this shit. Then, I had to make a mental note to get someone to unzip me enough to where I could reach it before I left. I find if I say something three times, I remember it.
Unzip, unzip, unzip
. I remembered; crisis averted upon my return.
I wanted to make another one with a matching jacket, but with an invisible zipper in the side. Plus, I wanted to line it for a nice finish. I used the same pattern as the other jumper, Simplicity 4789 (View C).
I hacked the pattern to do two things:
- Cut lining pieces
- Cut the back pattern piece on the fold (instead of two separate pieces) and remove the seam allowance (I used 1/2" because I can't be bothered with 5/8" allowances).
To eliminate the seam allowance, I placed the pattern piece on my fabric and just scooched it over 1/2" over the fold. Plus, I was feeling really smart because I went into this knowing I was going to line it (lately that has been more of an afterthought), so I placed the outer fabric down, then the liner fabric, and then the pattern piece on top and cut it all in one shot.
Efficiency
. Love it.
Since I was lining it, I also decided not to use the facing pieces for the neck and arm holes. More on that later...
Construction instructions went out the window and I had to do it differently.
First, I stitched the darts on the front liner and outer pieces.
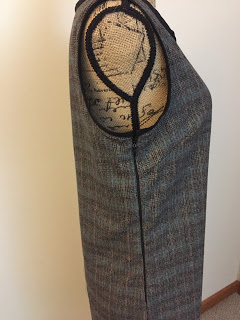
Since the invisible zipper was going into one of the side seams (I chose the right side), I attached the zipper to the outer back piece first.
Then attached the other side of the zipper to the front piece on the right side.
I wanted to zipper-sandwich it and do the outer/zipper/liner in one shot but it felt risky, so I did it separately. It's a good thing I didn't take this risk because when I stitched on the liner using the invisible zipper foot, the liner was too close to the zipper and it was getting stuck. So, I ripped out the the stitches on the liner and used a regular zipper foot so that I could move the stitches just slightly away from the teeth.
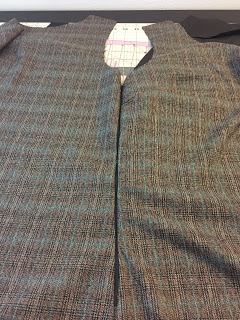
Then, I decided to close the remaining seam on the outer right side layer. I left the liner right side seam open and pulled it out of the way.
At this point liner and outer are Siamese twins, joined by a zipper at the right armpit, wrong side out.

Next, I sewed the outer front to back at the shoulders and at the left side seam. Did the same with the liner.
This is the part where I learn how apparel does not work like bags. Do not follow me down this rabbit hole: I wrestled with it to get the liner and outer right sides together. I stitched the layers together at the arm holes and the neck line. In my head, I would turn this right side out and all the seams would be nice and I'd just topstitch. Nope! This doesn't work like that. It's a good thing I didn't go ahead and serge or this project would have gone straight into the trash. I ripped out the neck seam first to see if that would work. Nope. Took out the left arm hole, and thought two seconds about hand stitching and the proceeded to rip out the right arm hole seam.
I got out the facing pattern pieces and looked at them for a while, thinking about how I'd account for the right arm where I placed the zipper. Then I opened my drawer of bias tape. I had enough1/2" black bias tape to do the arm holes and neckline, so I went with that. I think it adds a nice contrast.
However, now that I'm looking at the neckline, the bias tape doesn't really lay nice and flat, so I might pull that out and do the facing with the actual fabric. Maybe I will just leave it...maybe I just need to hit it with the iron...
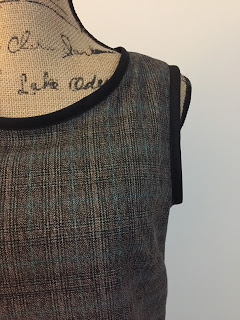
The side with the zipper looks okay, but I do need to get a little hook and eye closure to keep the arm hole from looking wonky since I used the bias tape.
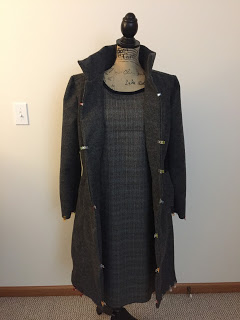
Penelope likes her new jumper and wool coat (if only I could decide on how I want to close the coat)! This will make a nice ensemble with my knee high boots!